


Note: The recommended way to use Shellfire VPN on Windows is by downloading the Shellfire VPN App. The app provides a simple, user-friendly interface for connecting to and switching between our secure VPN servers with just one click. You can download the Shellfire VPN app here. With the Shellfire VPN App, you can switch between Wireguard and OpenVPN depending on your needs and preferences.
Wireguard is gaining popularity thanks to its simplicity, efficiency, and connection speed. In this guide, we’ll walk you through setting up Shellfire VPN with the Wireguard client on your Windows PC so you can enjoy lightning‑fast speeds and robust security.
What You’ll Need
- A Windows PC with administrative privileges (Windows 10 or later)
- An active Shellfire VPN subscription - We currently do not offer config downloads for manual setups with Shellfire VPN Free. If you are a Free user, please stick to the Shellfire VPN App or consider upgrading.
- Wireguard for Windows – download from the official Wireguard website
- Access to your Shellfire Customer Center to retrieve your unique VPN configuration file
Step 1: Download and Install Wireguard
- Download the Installer: Visit Wireguard’s download page and download the latest version for Windows.
- Install the Application: Run the installer and follow the on‑screen instructions. Once installed, you should see the Wireguard icon on your desktop or in your Start menu.
Step 2: Obtain Your Shellfire VPN Wireguard Configuration
- Log into Your User Portal: Go to Shellfire User Portal and sign in with your credentials.
- Locate Your VPN Settings: navigate to Products -> Shellfire VPN, then select "Details". Activate the advanced settings as shown in the screenshots to enable the download option.Make sure the VPN protocol is set to Wireguard.
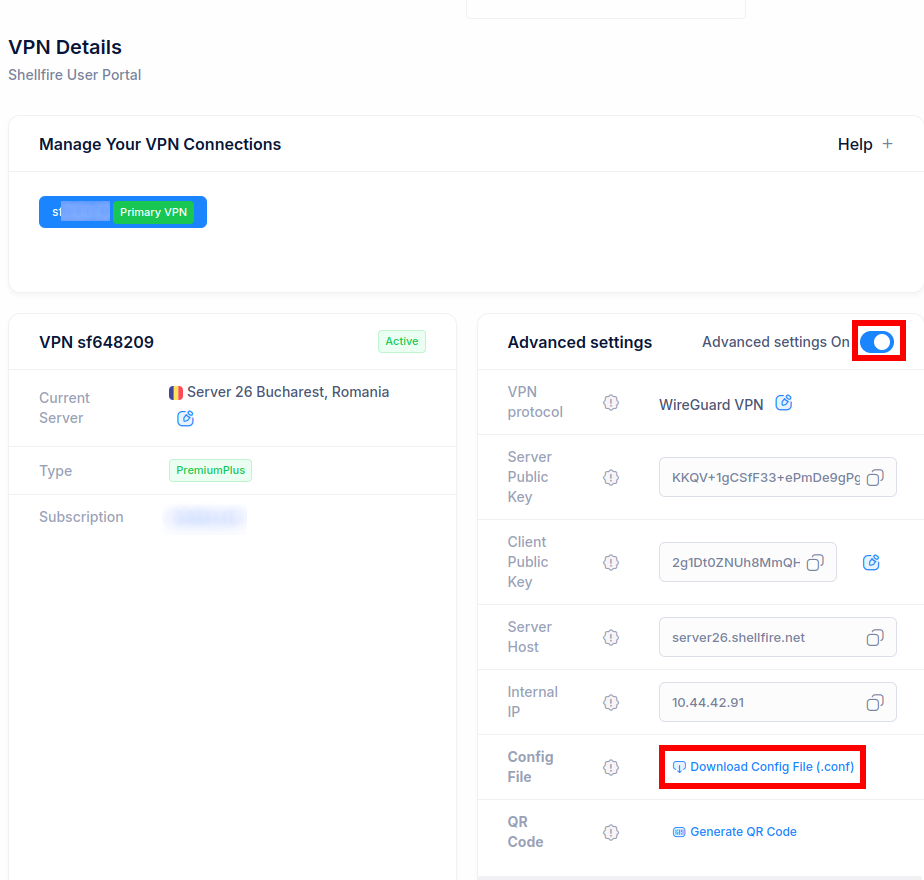
- Download the Configuration File: Save your .conf file to an easily accessible location on your PC.
Step 3: Import the Configuration into Wireguard
Launch Wireguard: Open the Wireguard application from your desktop or Start menu.
- Add a New Tunnel: Click on “Import tunnel(s) from file".
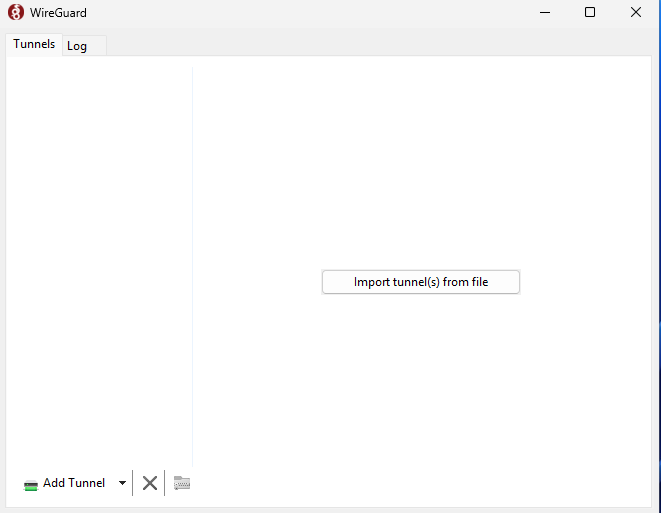
- Select Your Configuration File: Navigate to the location where you saved the Shellfire VPN Wireguard configuration file and select it. Wireguard will automatically import the necessary settings, including your public/private keys, the server endpoint, and allowed IP ranges.
Step 4: Establish the VPN Connection
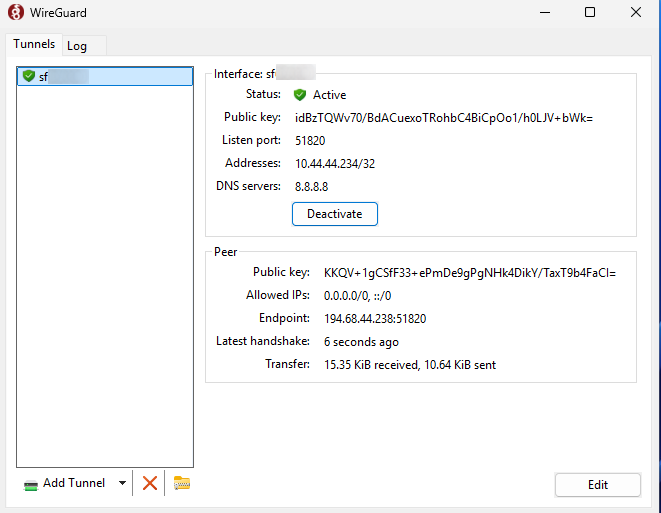
Activate the Tunnel: In the Wireguard client window, you’ll see your new tunnel listed (named sfXYZ after your Shellfire VPN Id). Click “Activate” to establish the connection.
You will now see an active connection:
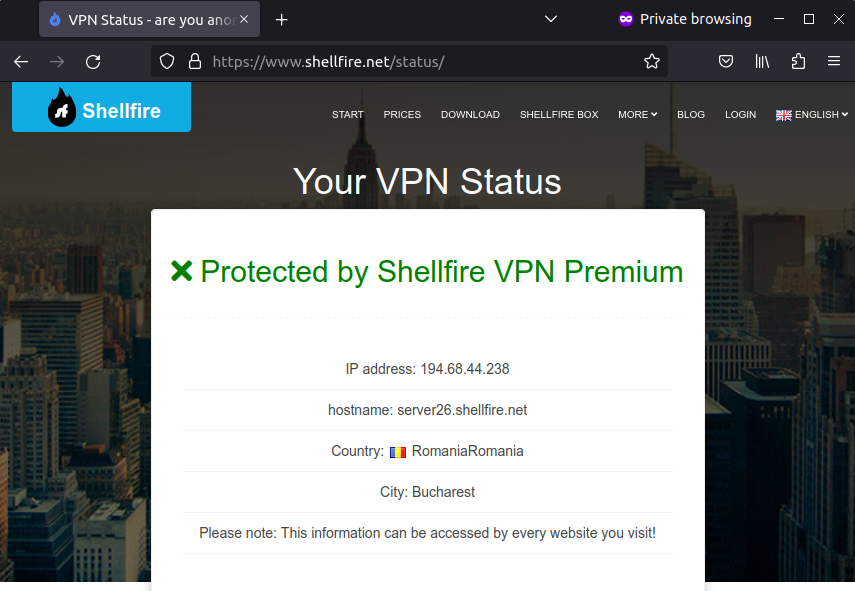
Verify Your Connection: Once connected, all your designated traffic will route through Shellfire VPN. To confirm, visit Shellfire Status or check your IP address on a service like WhatIsMyIP.com.
Step 5: Disconnecting and using the VPN later on
If you want to disconnect the VPN, just go back to the Wireguard App by clicking the little red Wireguard symbol in your task bar. Now, click on "Deactivate".
If you want to reconnect later, the fastest way is to right click the red Wireguard symbol in your task bar and then click on your VPN Id (sfXYZ). Repeat the same steps in order to disconnect the VPN.
Note: Every time you make changes to your VPN connection such as switching VPN protocols or changing the server, you will need to re-download and import your config, starting from step 2 of this guide.
Troubleshooting Tips
No data is flowing through the connection?
- Ensure that your Internet connection is active and that the Wireguard service is allowed through Windows Firewall.
- Try downloading and importing the config again starting from step 2 of this guide.
No protected status on the Shellfire Status page?
- Check your Wireguard connection is really active.
- Make sure you disable any additional internet connection on your computer. Sometimes you might have multiple internet connections, e.g. through Wi-Fi dongles, mobile data, Bluetooth or an Ethernet cable. Such a secondary connection might bypass the VPN so it is safer to disable it.
Conclusion
Setting up Shellfire VPN using Wireguard on Windows is quick and straightforward. With Wireguard’s modern encryption and performance benefits, you can enjoy a secure and fast VPN experience and superior pings during gaming without the hassle of complex configurations.
Enjoy secure browsing with Shellfire VPN and Wireguard!